
Raspberry Pi Arduino Communication
In order to open Raspberry Pi Serial Communication we will need to do couple of things.
- Download minicom
- Remove any reference to ttyAMA0 from the raspbian installation
As with any installation on your Pi, you will want to start with update and upgrade command
If you need to connect devices etc, I strongly recommend that you will have a voltage shifter between the Pi and the Arduino because of the Voltage differences.
If you used the Arduino code above and you have started minicom on the pi, after connecting all the required wires you can just type the pin number in the minicom terminal and you should be able to see the corresponding LED turning on
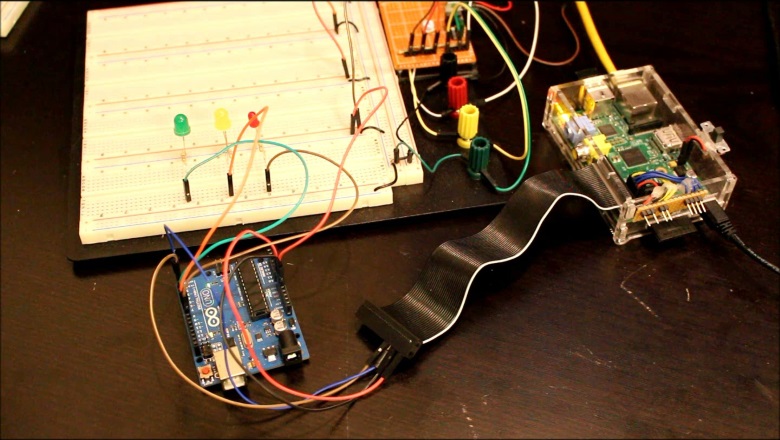
Raspberry Pi And Arduino Setup - Note 5V & GND from the Pi are connected to Vin & GND on the Arduino
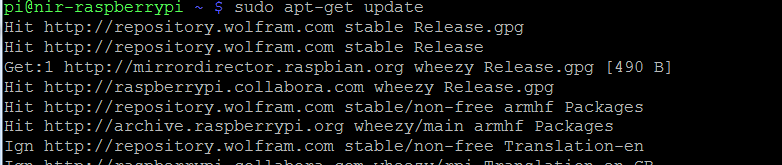
run:sudo apt-get update
run: sudo apt-get upgrade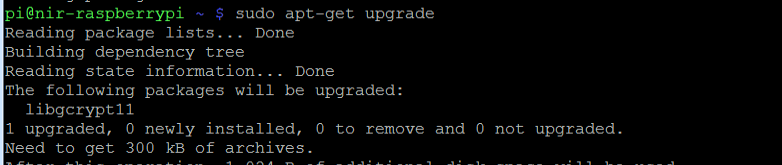
when both the update and upgrade commands finished run the following command to install minicom:
run: sudo apt-get upgrade
sudo apt-get install minicom
After you are done with that, you will need to update two files:
- /boot/cmdline.txt
- /etc/inittab
sudo cp /boot/cmdline.txt /boot/cmdline.txt.backup
than you will need to open the original file and remove reference to ttyAMA0:
sudo nano /boot/cmdline.txt
remove below:
console=ttyAMA0,115200 console=tty1
similarly you will want to do for inittab
sudo cp /etc/inittab /etc/inittab.backup
than you will need to open the original file and remove reference to ttyAMA0:
sudo nano /etc/inittab
remove below:
T0:23:respawn:/sbin/getty -L ttyAMA0 115200 vt100
to start minicom run this:
sudo minicom -b 9600 -o -D /dev/ttyAMA0
where:
- -b: allow you to set the baud rate
- -D: allow you to set the device
int const redPin = 9;
int const yellowPin = 8;
int const greenPin = 7;
void setup()
{
}
void loop()
{
}
int GetPinNumber()
{
void TurnCorrespondedLED(int pinNumber)
{
}
void TurnOffAll()
{
you will need to connect Arduino Rx, Tx to the Pi Tx,Rx (notice that Rx goes to Tx and Tx goes to Rx)
int const yellowPin = 8;
int const greenPin = 7;
void setup()
{
pinMode(redPin,OUTPUT);
pinMode(yellowPin,OUTPUT);
pinMode(greenPin,OUTPUT);
TurnOffAll();
Serial.begin(9600);
pinMode(yellowPin,OUTPUT);
pinMode(greenPin,OUTPUT);
TurnOffAll();
Serial.begin(9600);
}
void loop()
{
if(Serial.available()>0)
{
{
int pinNumber = GetPinNumber();
Serial.readString();
Serial.print("Value Serial got:");
Serial.println(pinNumber);
TurnOffAll();
TurnCorrespondedLED(pinNumber);
delay(250);
}Serial.readString();
Serial.print("Value Serial got:");
Serial.println(pinNumber);
TurnOffAll();
TurnCorrespondedLED(pinNumber);
delay(250);
}
int GetPinNumber()
{
int pinNumber = 0;
while(Serial.available()>0)
{
return pinNumber;
}while(Serial.available()>0)
{
char val = Serial.read();
Serial.println(val);
pinNumber*=10;
pinNumber+= (val-'0');
delay(25);
}Serial.println(val);
pinNumber*=10;
pinNumber+= (val-'0');
delay(25);
return pinNumber;
void TurnCorrespondedLED(int pinNumber)
{
if(pinNumber == redPin || pinNumber == yellowPin || pinNumber == greenPin)
digitalWrite(pinNumber,HIGH);
digitalWrite(pinNumber,HIGH);
}
void TurnOffAll()
{
digitalWrite(redPin,LOW);
digitalWrite(yellowPin,LOW);
digitalWrite(greenPin,LOW);
}digitalWrite(yellowPin,LOW);
digitalWrite(greenPin,LOW);
If you need to connect devices etc, I strongly recommend that you will have a voltage shifter between the Pi and the Arduino because of the Voltage differences.
If you used the Arduino code above and you have started minicom on the pi, after connecting all the required wires you can just type the pin number in the minicom terminal and you should be able to see the corresponding LED turning on